I know you've been waiting a seriously LONG time for this, but it's finally here...
The shirt manufacture!!!
Pinning and Cutting the Fabric and Interfacing.
-Lay out fabric and place on the pattern pieces.
(I did this wrong as not all my pieces fit on the fabric so I menouvered the pieces around cut things out seperately. My cuffs, yoke, bias binding and collar are also black on one side.)
-Pin and cut out.
-I also cut out interfacing for the collar, button stand, cuffs and yoke, these were all ironed onto the wrong side of the fabric.
Button Stand.
-Iron on interfacing to the button stand (on the front of the shirt) and fold on the notches.
Fold under by 1.5cm, sew a top stitch on the button stand down the edge.
(This, I will tell you now is NOT easy!!!)
 |
| This is my button stand pinned and ready to be sewn. |
Box Pleat.
-Iron in the box pleat at the back of the shirt. Sew this 1cm with NO backtack.
-Sew on the yoke 1.5cm on top of the pleat. Iron this so it is perfect. (Slightly pull.)
 |
| This is an image of the box pleat, yoke and collar. Sorry for any confusion. |
-For the yoke I had to sandwhich the back of my shirt between the two yoke pieces. Making sure the right sides were together.
-To attach my front pieces to the back I had to pin right sides together at the shoulder with a 1.5cm seam allowance.
-When sewn I overlocked the seams.
 |
Sorry about the side view.
This is my pinned yoke, it took me so long and so many pins to do this bit. HA! |
Pockets.
-Sew the pockets right sides together 1.5cm, leaving a gap to bag it out.
-I had to pin the pocket onto the front of shirt where I wanted it.
Sewing the pocket really close to the edge with small triangle in the top left and right corner to add durablity and a design feature. I put my pocket on at an angle and folded over a corner, to hold this in place I added a button.
(My pocket went completely wrong the first time so I redid it with a more durable fabric and took more time on it.) I prefer my new pocket, don't you?
 |
| This is my pocket and my garment. I am giving you the instructions differently to how I did it, as I had to re-do my pocket. |
 |
| Close up view!!! I love it!!! Sorry about it being on the side! |
Collar.
-Pin and stitch the two collar pieces, right side to right side.
-Reduce the bulk by cutting the corners and the excess material from the edge.
-Bag out and iron. (Pull a little to get it perfect.)
-Sandwhich the collar between the two collar stand pieces and stich together.
-Reduce the bulk, bag out and iron, just like on the collar.
-Attach the collar to the neck using the notches and even our the fabric. Sew 1.5cm.
 |
| The collar and collar stand all sewn together. |
 |
| My collar stood up. (Not sure if that's the right terminology. Ha!) |
 |
| My collar on a front view. |
 |
| My collar from a side view. |
Sleeves and body.
-To create the vent in the sleeve I had to slash upto the point on the sleeve I wanted it to be.
-To create a more professional edge on the vent I created bias binding by cutting two strips 4cm wide just slightly longer then my vents on the bias of my fabric.
-Sew the bias binding onto the wrong side of the fabric with a 1cm seam allowance.
-When I got the corner of the vent it got really tricky and I had to slight slice up the vent about 1cm so I could manouver around the corner.
-Iron this under and under again, this isn't easy either!
-Top stitch as close to the edge as humanly possible.
-Sew right side to right side, a diagonal line across the corner of the bias binding so it is a closed corner. I know that sounded complicated but it's easiest bit of bias binding! Ha!
-Attach the sleeve to the shoulder, right side to right side.
-Sew up the side and round down the arm and overlock, this closed up my shirt, turn these the right way.
 |
| My right sleeve. |
 |
| My left sleeve. |
 |
| My 'photographic' shot of my nearly done shirt. I was very proud of this! Ha! |
 |
| My inside seam. It was so neat! |
 |
| First half of my bias binding. Then it got DIFFICULT!!! |
 |
| My sewn bias binding curve, this was REALLY complicated! Ha! |
 |
| My complete bias binding. So proud! |
 |
| The full curve. |
 |
| Both completely done!! |
Cuff.
-Sew the two cuff pieces right side to right side. Reduce the bulk and bag it out, like the collar.
-Sew two rows of tacking stitch with a back tack at only one end of each row. (Sew these either side of the 1.5cm point.)
-Pull these strings to create a ruffle the same size as the cuff.
-To sew on the cuff properly; sew right side to right side.
-Turn the cuff over and top stitch.
-Now undo the ruffle threads.
 |
| My ruffles. |
 |
| My sewn cuff. |
 |
| My sewn cuff reverse. |
 |
| Cuff pinned to the ruffles. Sorry you can't see it but the pins are visible slightly. |
 |
| My cuff pinned to ruffles. You can see it now! Ha! |
 |
| The cuff folded over the ruffles ready for a top stitch! |
 |
| The right side of my fabric. Excited I'm nearly done!! |
 |
| My completed cuff!!!!!! YAY!!! |
Hem.
-Over lock the whole of the bottom.
-Turn under; just so the overlock is folded under.
-Fold under again this time between 1 and 1.5cm.
Buttons and Button Holes.
-Measure the length of the button stand and equally measure in the buttons.
-Do the same on the opposite side so as to create the button holes.
-I had to make sure I put buttons and button holes on my collar stand and cuffs too.
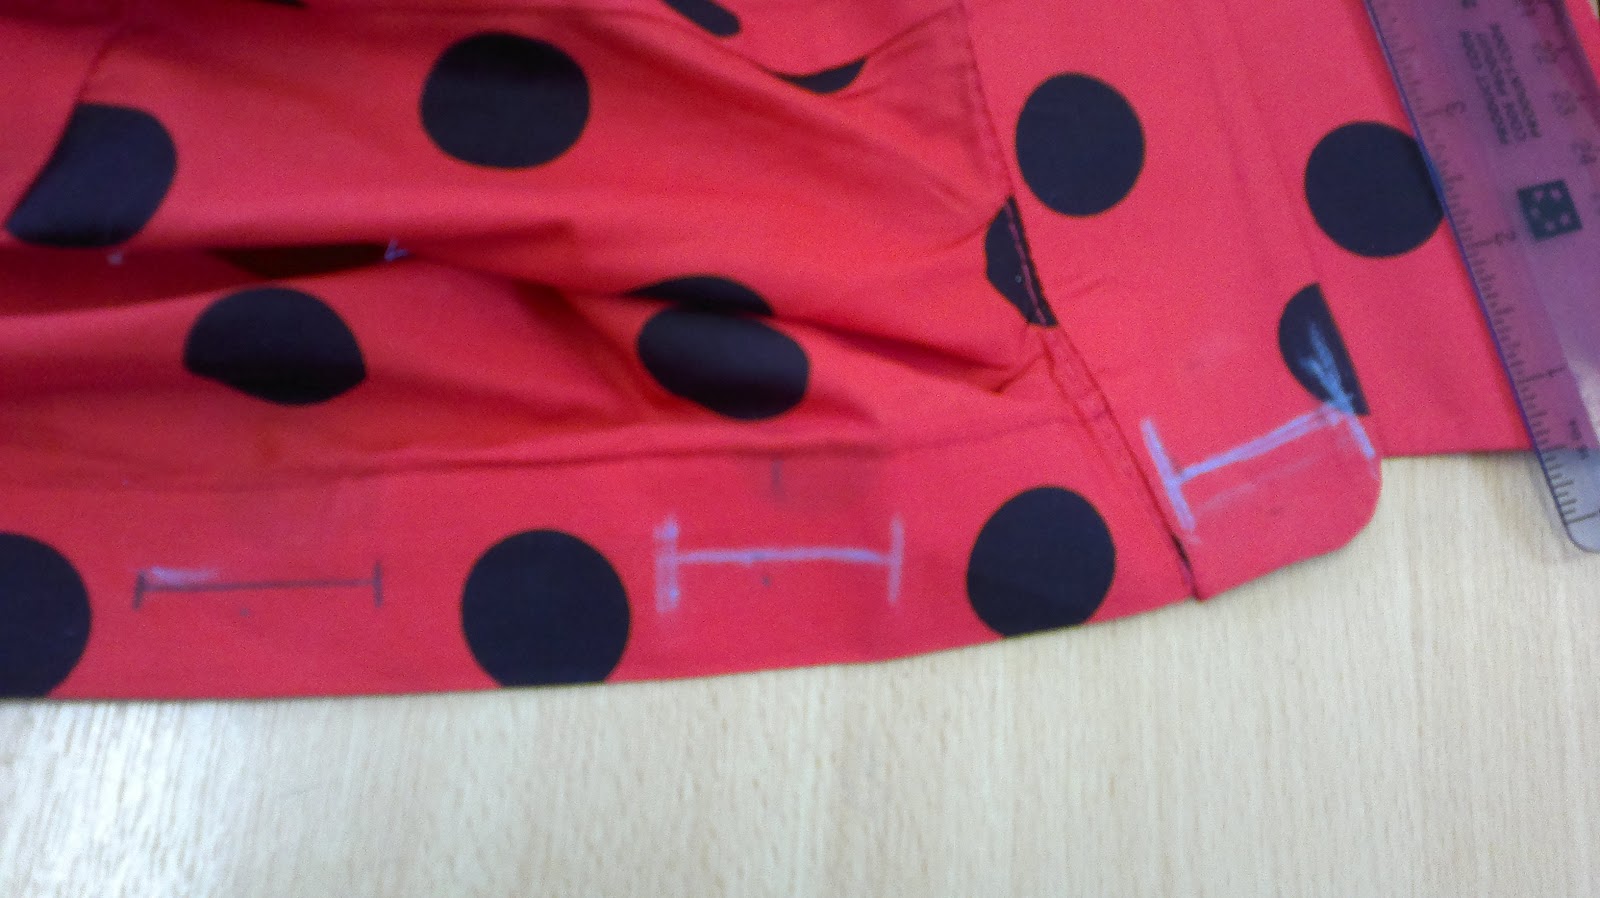
 |
| My button hole markings. |
 |
| All buttoned up! |
Hem.
-To complete the hem I overlocked my raw edge, folded up the overlocking, I then folded it under again.
-To keep this folded I ironed and pinned it.
-To complete my shirt I sewed this very close to the edge with a neat row of straight stitch.
 |
| Folded once. |
 |
| Folded twice. |
 |
My completed hem.
So proud of my sewing, it went so straight!!! Ha! |
FINAL SHIRT!!!
 |
| My FINAL shirt!!! |
 |
| My 'photographic' view, slightly on the side. |
 |
| My 'photographic' view of my collar and buttons. |
 |
| My 'photographic' view of my sleeve, pocket and buttons. |
What do you think?
Do you like?
I love it!!!
XOXO